A homemade dog anti itch spray is a DIY topical solution crafted from natural, household ingredients to relieve a dog’s itchy skin. Often made with apple cider vinegar, calendula, or brewed green tea, these sprays aim to soothe irritation caused by dry skin, allergies, or minor insect bites. While they offer a gentle alternative to commercial products, it’s crucial to use dog-safe ingredients and consult a vet for persistent or severe itching to rule out underlying health issues.
Key Benefits at a Glance
- Cost-Effective: Save money by using common, inexpensive household ingredients like apple cider vinegar and brewed tea.
- Ingredient Control: Avoid harsh chemicals, fragrances, and preservatives found in many store-bought products.
- Natural Soothing: Provide gentle, immediate relief for minor skin irritations using natural anti-inflammatory ingredients.
- Quick & Easy to Make: Mix an effective spray in just minutes with readily available ingredients and a simple spray bottle.
- Customizable Formulas: Easily adjust recipes by adding dog-safe ingredients like aloe vera or oatmeal to target specific skin needs.
Purpose of this guide
This guide is for dog owners seeking safe, natural, and affordable ways to soothe their pet’s itchy skin at home. It solves the common problem of finding a reliable DIY recipe by providing clear, step-by-step instructions for creating an effective dog anti itch spray. You will learn which household ingredients are safe and beneficial, how to properly mix and apply the solution for maximum relief, and what common mistakes to avoid, such as using essential oils that are toxic to dogs. Our goal is to help you provide immediate comfort while also knowing when to consult a veterinarian.
After years of watching my Labrador Scout scratch herself raw during allergy season, I discovered something that changed everything: the power of homemade dog anti-itch sprays. What started as frustration with expensive commercial products that barely worked led me to research and test natural ingredients that actually provide relief. Through trial and error with multiple dogs experiencing different skin conditions, I’ve developed recipes that cost just $2-5 per batch and take only 5-15 minutes to prepare. These aren’t just random internet remedies – they’re battle-tested solutions backed by scientific understanding of how natural ingredients work on canine skin.
Common causes of itchiness in dogs
Understanding what's causing your dog's discomfort is the first step toward effective treatment. After dealing with various skin issues across different dogs in my care, I've learned to recognize the patterns that indicate specific conditions. Environmental allergies typically flare up during spring and summer when pollen counts are high, while food sensitivities create year-round symptoms that often include ear infections and paw licking alongside the scratching.
Parasitic infestations like fleas and mites cause intense, localized scratching and are most common during warm months. I remember discovering tiny black specks in Scout's fur that turned red when dampened – classic flea dirt that explained her sudden obsession with scratching her hindquarters. Bacterial infections often develop in areas where moisture gets trapped, creating hot spots with a distinctive odor and pustule formation.
Yeast infections thrive in warm, moist environments and produce that unmistakable musty smell, particularly around ears and paw pads. These fungal issues become more prevalent during humid weather when dogs spend more time indoors with less air circulation.
| Cause | Common Triggers | Typical Symptoms | Seasonality |
|---|---|---|---|
| Environmental Allergies | Pollen, dust mites, mold | Red, inflamed skin, excessive scratching | Spring/Summer |
| Food Allergies | Chicken, beef, wheat, dairy | Ear infections, paw licking, digestive issues | Year-round |
| Parasites | Fleas, ticks, mites | Intense scratching, visible bugs, hair loss | Warm months |
| Bacterial Infections | Moisture, wounds, compromised skin | Hot spots, pustules, odor | Any season |
| Fungal/Yeast | Warm, moist areas | Musty smell, dark discharge, ear problems | Humid weather |
- Watch for scratching patterns – timing and location matter
- Note environmental changes that coincide with itching episodes
- Track which body parts are most affected
- Document seasonal variations in symptoms
- Keep a simple log of triggers and responses
Understanding why dogs get itchy skin
Learning to read your dog's scratching behavior reveals valuable clues about the underlying cause. I discovered this when tracking Scout's seasonal pattern – she consistently started scratching her belly and paws in early April, right when the oak trees began releasing pollen. This timing helped me identify environmental allergens as the culprit rather than food sensitivities.
The location of scratching tells its own story. When dogs focus on their ears, yeast infections are often the culprit. Paw licking and chewing typically indicates contact with environmental irritants during walks. Belly scratching suggests contact allergies from grass or cleaning products, while scratching around the tail base often points to flea infestations.
Frequency and intensity matter too. Occasional scratching is normal, but persistent scratching that interrupts sleep or daily activities signals a problem requiring intervention. I've learned that acute onset scratching – sudden, intense episodes – often indicates contact with a specific irritant, while chronic, low-level scratching suggests ongoing allergies or skin conditions.
When to use homemade remedies vs professional treatment
Through experience with multiple dogs, I've learned to recognize when my homemade remedies are appropriate and when professional veterinary care is essential. The key is understanding that homemade solutions work best for mild, localized skin irritation and as complementary care alongside professional treatment for diagnosed conditions.
I remember the day I realized Scout needed more than home remedies. What started as typical seasonal scratching rapidly spread across her entire belly, with angry red welts appearing overnight. The speed of progression and her obvious discomfort told me this was beyond my homemade spray's capabilities. Within 72 hours of starting home treatment without improvement, it's time to consult a veterinarian.
Veterinarians can identify underlying conditions like hypothyroidism or Cushing's disease that cause secondary skin symptoms. They can also diagnose bacterial or fungal infections requiring prescription medications. My approach now combines the best of both worlds – using homemade remedies for maintenance and mild flare-ups while working with my vet for proper diagnosis and treatment of serious conditions.
- Open wounds or bleeding from scratching
- Rapid spreading of affected areas
- Signs of systemic illness (lethargy, loss of appetite)
- No improvement after 72 hours of treatment
- Severe swelling or discharge
- Behavioral changes or signs of pain
- DO use homemade remedies for mild, localized itching
- DO continue home care alongside veterinary treatment
- DON’T delay professional care for severe symptoms
- DON’T use home remedies on open wounds without vet approval
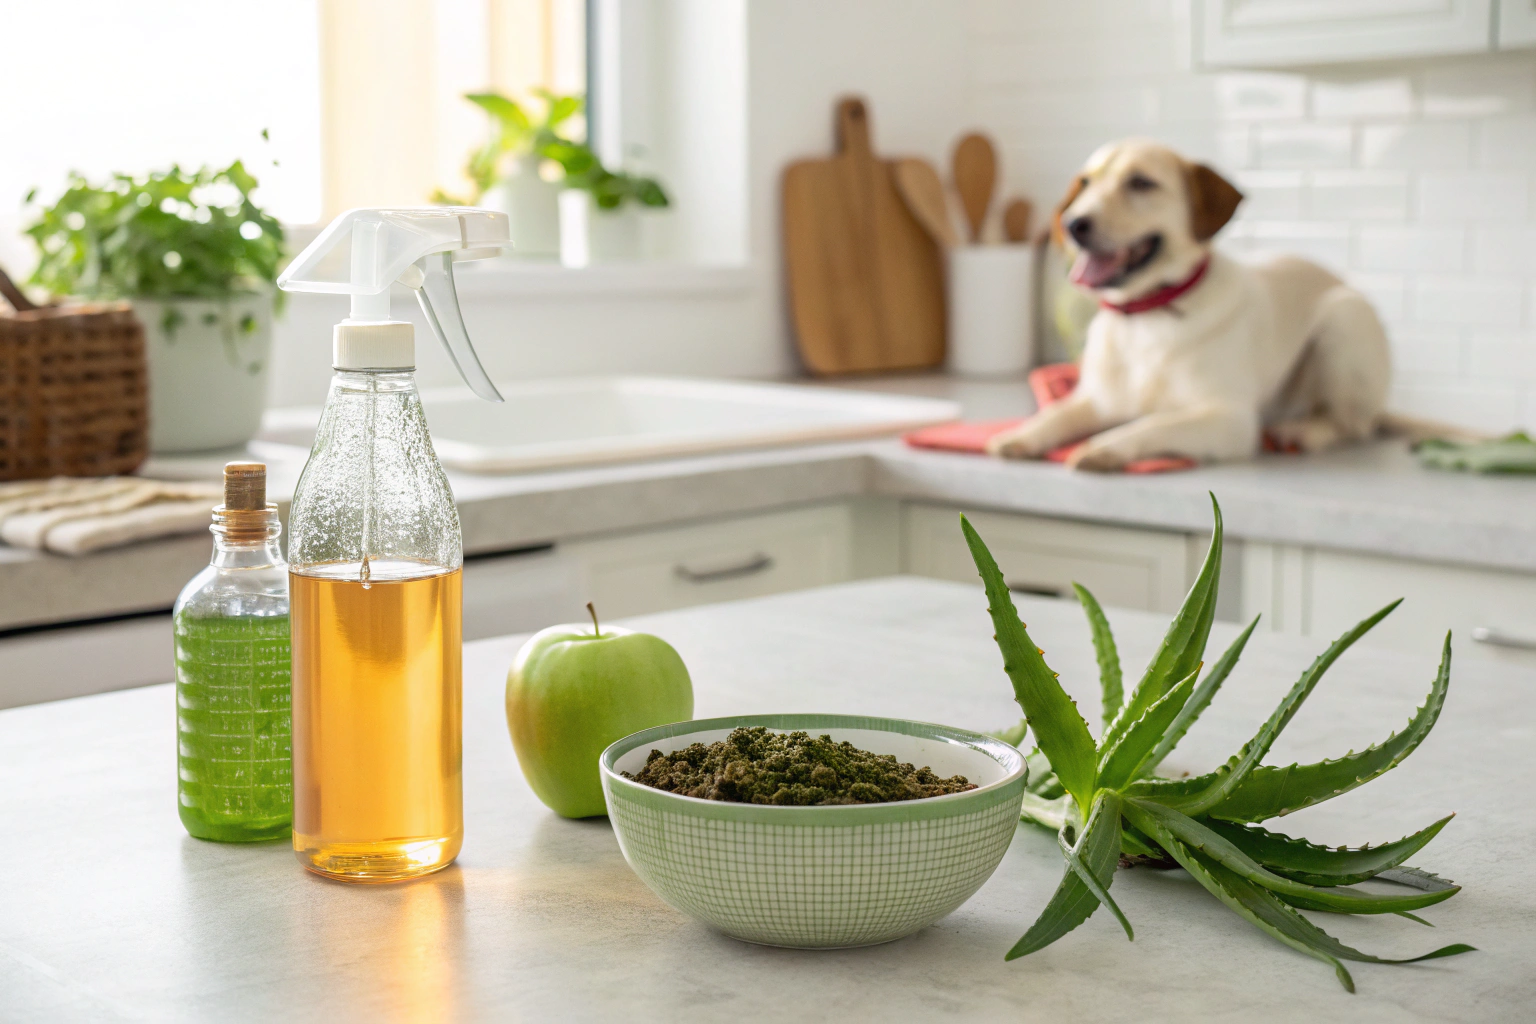
The science behind effective anti-itch ingredients
My journey into understanding why certain natural ingredients work for dog skin issues began with research into the mechanisms behind traditional remedies. Rather than blindly following random recipes online, I wanted to understand the science that makes these ingredients effective. This knowledge helped me create more targeted formulations and avoid combinations that might counteract each other's benefits.
Apple cider vinegar soothes dog skin just as it traps gnats—learn its dual uses in my Gnat Vinegar Trap guide.
The most effective natural ingredients work through multiple mechanisms. pH balancing ingredients like apple cider vinegar restore the skin's natural protective barrier, which becomes compromised during allergic reactions and infections. Anti-inflammatory compounds found in green tea and chamomile reduce the cellular inflammation that causes redness, swelling, and discomfort. Antimicrobial ingredients naturally combat the bacteria and yeast that often complicate skin conditions.
Cooling agents like aloe vera provide immediate relief from the burning sensation that drives compulsive scratching. Understanding these mechanisms helped me realize why my early attempts at homemade remedies were hit-or-miss – I was combining ingredients randomly rather than selecting them for complementary actions.
| Ingredient | Active Properties | Mechanism | Best For |
|---|---|---|---|
| Apple Cider Vinegar | pH 2-3, Antimicrobial | Balances skin pH, kills bacteria/yeast | Yeast infections, odor |
| Green Tea | High antioxidants, Anti-inflammatory | Reduces cellular inflammation | Red, inflamed skin |
| Aloe Vera | Cooling, Moisturizing | Soothes and hydrates skin | Hot spots, dry skin |
| Oatmeal | Beta-glucans, Anti-inflammatory | Forms protective barrier | Widespread irritation |
| Coconut Oil | Lauric acid, Moisturizing | Antimicrobial and hydrating | Dry, flaky skin |
Benefits of apple cider vinegar for itchy dogs
My discovery of apple cider vinegar's transformative power came during a particularly stubborn yeast infection in Scout's ears. After researching the science behind ACV, I learned that its low pH of 2-3 creates an environment hostile to yeast and bacteria while helping restore the skin's natural protective acid mantle.
The key is using organic, unfiltered apple cider vinegar containing "the mother" – those cloudy strands visible in quality brands like Bragg's. The mother contains beneficial enzymes and bacteria that enhance the antimicrobial properties. I learned this the hard way after trying clear, filtered vinegar with minimal results.
“A 1:1 combination of apple cider vinegar and water poured into a spray bottle will be good enough. You can spray the solution directly on your dog’s itchy skin. However, be careful not to use this solution on raw skin or open wounds as it can be painful for your dog.”
— PetCubes, January 2024
Source link
Proper dilution is crucial – I use ratios from 1:1 to 1:4 depending on the severity of the condition and my dog's sensitivity. The vinegar smell is noticeable for 1-2 hours after application but dissipates completely. Store your ACV at room temperature and shake well before each use, as the beneficial compounds can settle.
The power of green tea and herbal ingredients
Green tea became my go-to anti-inflammatory ingredient after witnessing its effects during Scout's worst allergy flare-up. The polyphenols in green tea are powerful antioxidants that work at the cellular level to reduce inflammation, while the tannins provide mild antimicrobial benefits.
I prepare green tea by steeping 2-3 tea bags in one cup of boiling water for 10 minutes, then cooling completely before use. This longer steeping time extracts maximum beneficial compounds. The cooled tea stays fresh in the refrigerator for up to 3 days, and the cool temperature provides additional soothing relief when applied.
Chamomile offers similar anti-inflammatory benefits with the added advantage of natural calming aromatherapy effects. I often substitute chamomile tea when dealing with anxious dogs who associate their skin problems with stress. The gentle, apple-like scent seems to have a calming effect during application.
Safe essential oils for dog skin spray
Essential oil safety for dogs became my obsession after reading about potential toxicity issues. While certain oils can enhance therapeutic effects when properly diluted, many commonly recommended oils are actually dangerous for dogs. My conservative approach prioritizes safety over potential benefits.
Tea tree oil, despite its antimicrobial reputation, is toxic to dogs and can cause serious neurological symptoms. Citrus oils (lemon, orange, grapefruit), eucalyptus, and peppermint are also on my never-use list. Even "safe" oils like lavender and chamomile require extreme caution with dilution – never more than 2-5 drops per full cup of spray mixture.
Not all essential oils are safe for dogs—see my full safety analysis in Is Mosquito Repellent Safe for Dogs?
- NEVER use tea tree oil on dogs – it’s toxic
- Avoid citrus oils (lemon, orange, grapefruit)
- Skip eucalyptus and peppermint oils
- Always dilute to 2-5 drops per cup maximum
- Test on small area first and watch for reactions
- Lavender oil – calming and anti-inflammatory
- Chamomile oil – gentle and soothing
- Calendula oil – promotes healing
- Always use therapeutic-grade oils
- Store oils in cool, dark places
I always test new essential oil formulations on a small patch of skin first, waiting 24 hours to ensure no adverse reactions occur. When in doubt, I skip the essential oils entirely – the base recipe is effective without them.
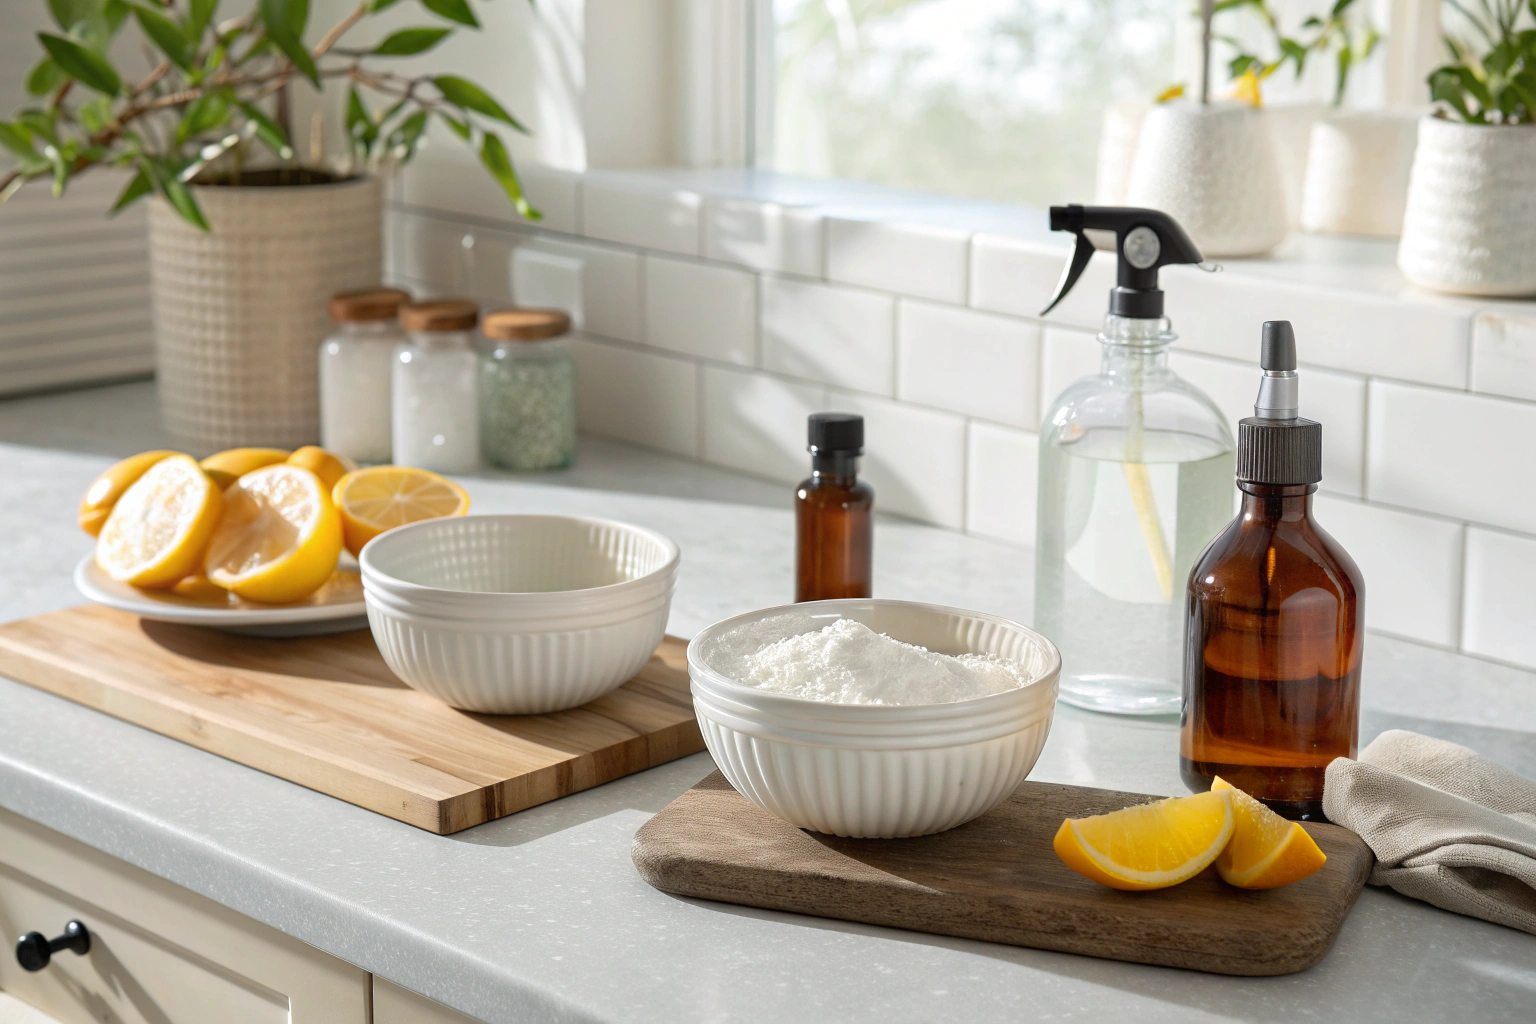
My tried and tested homemade dog anti itch spray recipe
This recipe emerged from months of testing and refinement with my own dogs and consultation with fellow pet owners dealing with similar challenges. Each ingredient serves a specific purpose, creating synergistic effects that address multiple aspects of skin irritation simultaneously.
The foundation is cooled green tea, which provides anti-inflammatory compounds and a soothing base. Apple cider vinegar balances pH and provides antimicrobial action, while aloe vera delivers immediate cooling relief and moisturizing benefits. The optional lavender oil adds gentle anti-inflammatory properties and a pleasant scent that masks the vinegar odor.
This master recipe costs approximately $3-4 per batch and provides enough spray for 1-2 weeks of regular use when stored in the refrigerator. The shelf life of 1-2 weeks refrigerated ensures you're always using fresh, potent ingredients while maintaining the pH balance between 5.5-7.0 that's optimal for canine skin health.
Step by step preparation guide
Making this spray takes just 15 minutes of active time, though you'll need to factor in cooling time for the tea. I always prepare batches in the evening so the tea can cool overnight, making the spray ready for morning application.
The process is straightforward, but small details make a significant difference in effectiveness. Using filtered water for steeping produces cleaner-tasting tea, and allowing complete cooling prevents the heat from degrading the beneficial compounds in other ingredients.
- Steep 2-3 green tea bags in 1 cup boiling water for 10 minutes
- Remove tea bags and let cool completely to room temperature
- Add 1/4 cup organic apple cider vinegar with the mother
- Stir in 2 tablespoons pure aloe vera gel until well mixed
- Add 5 drops lavender oil if desired (optional)
- Pour mixture into clean spray bottle
- Shake well before each use
- Store in refrigerator for up to 2 weeks
I use glass spray bottles when possible, as they don't retain odors and are easier to clean thoroughly between batches. The refrigerated storage not only extends shelf life but provides additional cooling relief when applied to inflamed skin.
Ingredients you should always have on hand
After years of making these remedies, I've organized my pet care pantry for maximum efficiency. Having these staples means I can prepare a fresh batch within 15 minutes whenever needed, without emergency trips to the store during a flare-up.
My essential inventory includes organic unfiltered apple cider vinegar with the mother – Bragg's is my preferred brand for consistency and quality. I keep pure aloe vera gel in the refrigerator, though I also maintain an aloe plant for fresh gel when needed. Organic green tea bags store well in a cool, dry place, and I always have chamomile as a backup option.
- Organic unfiltered apple cider vinegar with the mother (Bragg’s brand)
- Pure aloe vera gel or fresh aloe plant
- Organic green tea bags (chamomile as alternative)
- Therapeutic-grade lavender essential oil
- Colloidal oatmeal for baths
- Organic virgin coconut oil
- Clean spray bottles (8-16 oz capacity)
- Glass storage containers for batch preparation
For essential oils, I invest in therapeutic-grade lavender oil stored in a cool, dark place to maintain potency. Colloidal oatmeal and organic coconut oil round out my arsenal for specialized recipes and complement treatments.
Application techniques for maximum effectiveness
Proper application technique makes the difference between mediocre results and dramatic improvement. I learned this through trial and error, particularly with dogs who were initially uncooperative during treatment sessions.
The key is applying after walks when dogs are naturally tired and more willing to stand still. I hold the spray bottle 4-6 inches from the skin, part the fur to reach affected areas directly, and spray lightly rather than soaking the area. Gentle massage helps distribute the solution while providing additional comfort through touch.
“To avoid getting vinegar in any open cuts, fill a spray bottle with 50% water and 50% apple cider vinegar to target affected areas. If your dog walked through a patch of poison ivy, oak, or sumac, soak their paws in the solution for up to five minutes.”
— AKC Pet Insurance, March 2024
Source link
- Hold spray bottle 4-6 inches from skin for even coverage
- Part fur to reach affected skin areas directly
- Apply after walks when dog is tired and cooperative
- Use treats or toys to distract during application
- Massage gently into skin after spraying
- Prevent licking for 10 minutes post-application
- Mild itching: Once daily application
- Moderate irritation: Twice daily
- Severe symptoms: Up to 3 times daily until improvement
- Avoid eyes, ears, and genital areas
- Reduce frequency as symptoms improve
Preventing licking for 10 minutes after application allows the ingredients to absorb properly. I use this time for positive distraction with favorite toys or training sessions, turning treatment time into bonding time.
Alternative recipes for specific skin conditions
While my master recipe handles most common skin irritations, specific conditions benefit from targeted modifications. These specialized formulations adjust ingredient ratios and add condition-specific components based on the underlying problem.
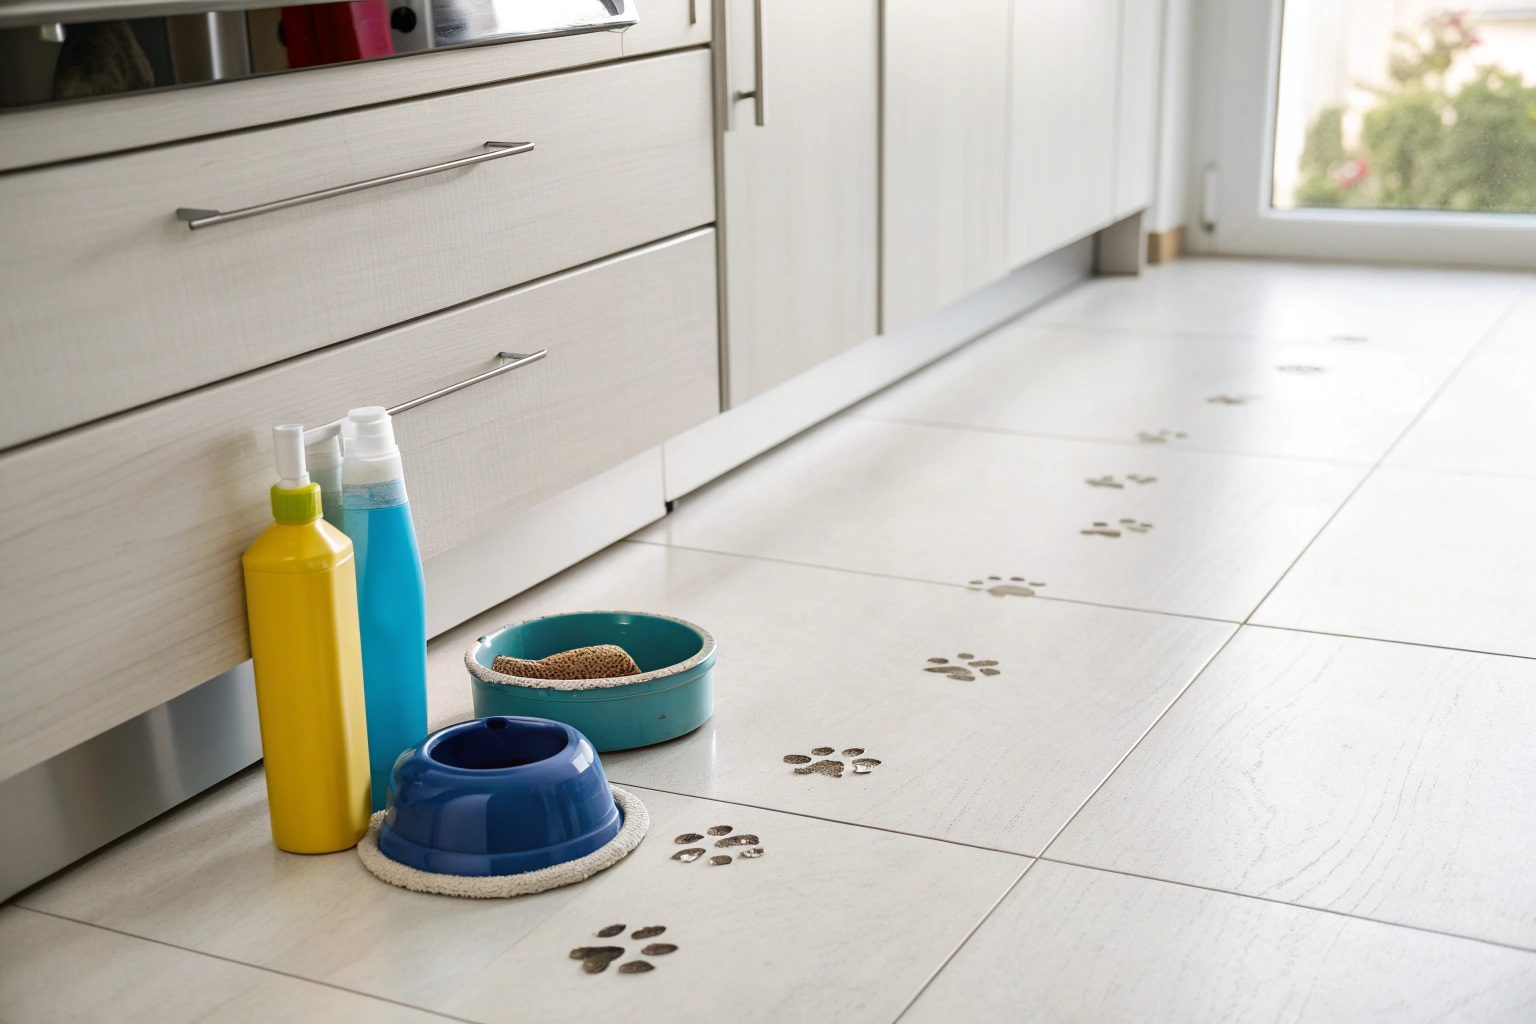
Reduce skin irritation at the source by cleaning floors with pet-safe formulas: DIY Pet-Safe Floor Cleaner.
For hot spots – those angry, inflamed areas that seem to appear overnight – I double the aloe vera concentration and add calendula for enhanced healing properties. Dry, flaky skin responds better to formulations that include coconut oil for moisturizing while reducing the ACV concentration to prevent over-drying.
Yeast infections require stronger antimicrobial action, so I increase the apple cider vinegar concentration and add antifungal herbs like calendula or diluted oregano oil. Each modification addresses the specific mechanisms driving different skin conditions.
| Recipe Type | Key Modifications | Best For | Application Frequency |
|---|---|---|---|
| Hot Spot Intensive | Double aloe vera, add calendula | Localized inflammation | 3x daily |
| Dry Skin Moisturizing | Add coconut oil, reduce ACV | Flaky, dry skin | 2x daily |
| Yeast Infection Targeted | Increase ACV, add antifungal herbs | Musty odor, ear issues | 2-3x daily |
For more homemade options, see the DIY spray recipe and learn details at this home remedies guide.
DIY oatmeal bath for comprehensive relief
When spot treatments aren't sufficient for widespread irritation, oatmeal baths provide whole-body relief that complements spray applications. I discovered this necessity during Scout's worst allergy episode, when her entire belly and legs were inflamed beyond what targeted spraying could address.
The key is using colloidal oatmeal – finely ground oats that disperse evenly in water rather than clumping. Regular oatmeal ground in a blender works perfectly and costs a fraction of commercial colloidal oatmeal products.
- Grind 1 cup plain oatmeal in blender to fine powder
- Fill bathtub with lukewarm water (not hot)
- Add oatmeal powder while stirring to prevent clumping
- Let dog soak for 10-15 minutes in the oatmeal water
- Gently massage the mixture into affected skin areas
- Rinse lightly with clean water
- Pat dry with soft towel – avoid rubbing
The beta-glucans in oatmeal form a protective film on the skin while reducing inflammation. I follow oatmeal baths with my regular spray application once the skin is completely dry, creating a comprehensive treatment approach for severe episodes.
Frequently Asked Questions
To measure waist for men accurately, stand straight and locate the natural waistline, which is typically just above the hip bones. Use a flexible tape measure, wrap it around your waist without sucking in your stomach, and ensure it’s level all around for a precise reading. This method helps in determining clothing sizes or tracking health metrics like waist circumference.
When learning how to measure waist for men, place the tape at the narrowest part of the torso, usually between the ribs and hips. Avoid measuring over clothing for accuracy, and breathe normally to get a true measurement. This spot ensures consistent results for fitness or tailoring purposes.
A soft, flexible measuring tape is essential for how to measure waist for men, as it conforms to the body’s shape. You might also use a mirror to check if the tape is level. Digital calipers or apps can assist but a simple tape provides the most reliable manual method.
One common error in how to measure waist for men is pulling the tape too tight, which gives an inaccurate smaller reading. Another is measuring at the wrong height, like over the hips instead of the true waistline. Always measure after exhaling and ensure the tape is parallel to the floor for best results.
Knowing how to measure waist for men is crucial for assessing health risks like obesity or heart disease, as waist size indicates abdominal fat. It also aids in buying properly fitted clothes or tracking fitness progress. Regular measurements can motivate lifestyle changes for better overall well-being.